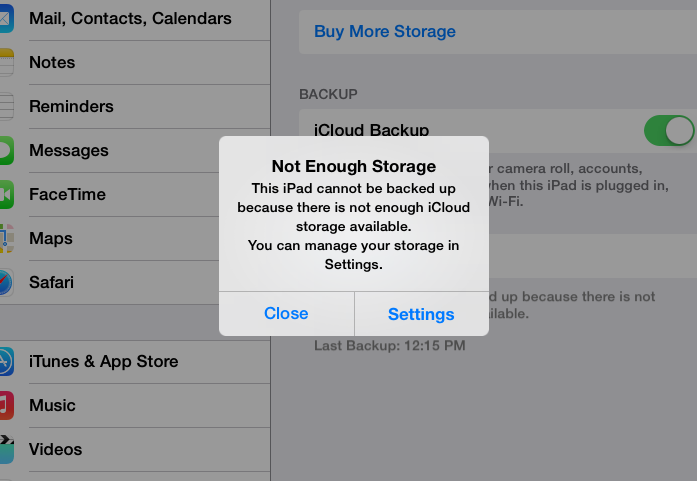
Earlier last month, we showed you how to set up an iCloud backup for your iPhone or iPad. However, if you are backing up multiple devices to iCloud and have the standard free 5 gb of iCloud storage, chances are that your iCloud is full or close to it. If this is the case, you should be familiar with the following error message:
Upgrading Your iCloud Storage
If your iCloud is full, there are two options available that will allow you to continue backing up your precious data. The first option is to upgrade your iCloud storage. To do this, follow these simple steps:
- Go to the “Settings” app on your device
- Scroll down and select “iCloud”
- Scroll down and select “Storage & Backup” - in this page, you will be able to see the total storage of your iCloud account as well as the available storage left for use.
- Click “Buy More Storage”
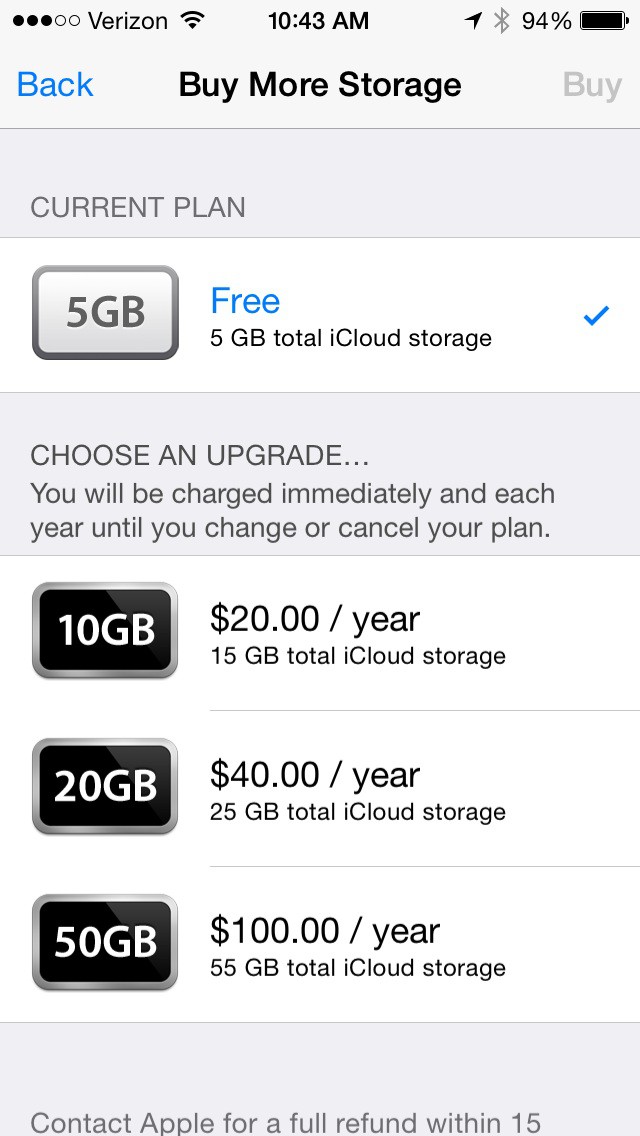
From here, you are able to upgrade your iCloud storage with a few simple clicks. The same card you use to purchase iTunes content and App Store apps will be charged automatically and your subscription will be automatically renewed annually. Your increased iCloud storage will be available immediately after upgrading. Here are the pricing options for additional iCloud storage (note: iCloud pricing plans to change with the release of iOS 8 and OS X 10.10 Yosemite):
Once you’ve upgraded your iCloud account, you will be able to continue backing up to iCloud without having to worry about not having enough available storage.
Backing Up Through iTunes
If you would rather not pay to upgrade your iCloud account but would still like to keep backups of your iPhone or iPad, a second option would be backing up your device through iTunes. Unlike backing up through iCloud, an iTunes backup does not occur wirelessly and will not automatically backup your device every day. In order to back up through iTunes, you first need to plug your device into a computer with iTunes using the same USB cord you use to charge your device. Once plugged in, you should see your device appear in the iTunes window under the “Devices” section.
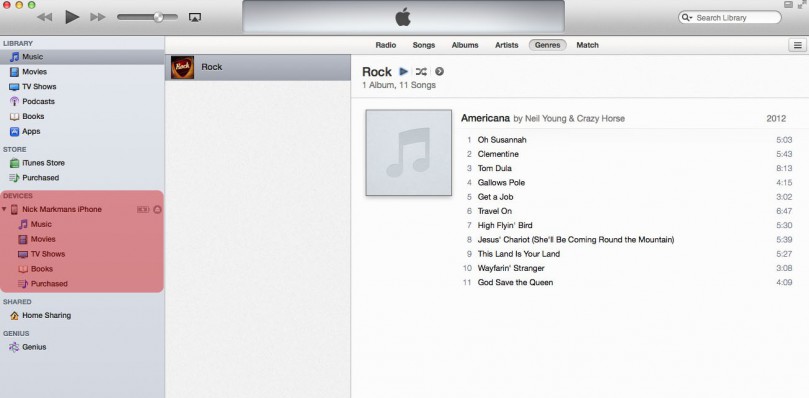
From here, click on your device under the “Devices” section to pull up the “Summary” section for your device. This section provides a general overview of your device - displaying general information such as device name, a breakdown of the device’s storage, software updates (if available) and backup information.
To begin the iTunes backup, first click on the “This computer” bubble within the “Backups” section. Then click the “Back Up Now” button and your device will automatically backup to iTunes.
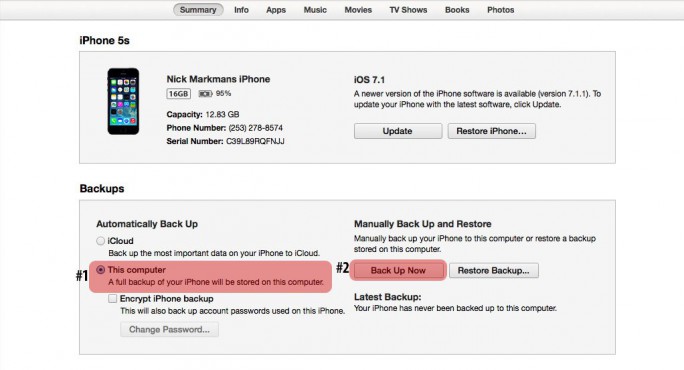
Let’s take a look again at the steps we took to backup a device to iTunes:
- Connect device to computer with USB cable
- Open iTunes on your computer
- Click “Trust” on your device to allow iTunes to access it (iOS7 only)
- Select your device under the “Devices” section in iTunes
- In the “Summary” section, select “This computer” as your backup option
- Click the “Back Up Now” button
Restoring from an iTunes Backup
Let’s say that we happen to break our device and replace it or somehow manage to wipe our device, loosing all our precious data. How do we then go about restoring from the iTunes backup we previously made? The process is incredibly simple.
Just like when we did our iTunes backup, we first want to plug in the device to be restored and select it under the “Devices” section in iTunes. This will pull up the “Summary” view that we see in the picture above. This time, instead of clicking “Back Up Now”, we want to click on the “Restore Backup...” button right next to it.
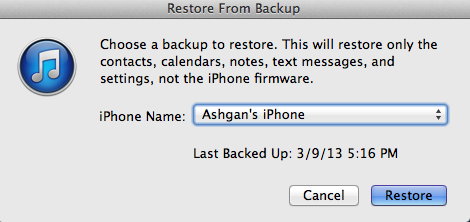
From here, we are presented with the “Restore From Backup” window. In this window, we can select which backup we want to restore from in the case that there are multiple backups in iTunes. Once we have the correct backup selected, we click “Restore” and viola! iTunes will now do its thing and restore all of your data to your device.
In conclusion, we’ve reviewed how to upgrade your iCloud storage, do a backup through iTunes as well as how to restore from an iTunes backup. By ensuring that you are either backing up automatically through iCloud or regularly backing up through iTunes, you can rest assure that no matter what happens to your devices, your data will always be safe.