 Backing up your files is important. To illustrate the importance of this issue, I’d like to tell you a short story. We had a customer, let’s call her “Allie”. Allie had an iMac and had never done a backup. She updated to Mac 10.9 and during the process, her MacBook Pro ran into some problems. Eventually the Macbook Pro was fixed but all the data on the Mac was lost, including the photos of her newborn child.
These stories are common and heartbreaking. What’s worse is that they all could have been avoided by backing up the files via Time Machine.
Time Machine is a very simple tool in Mac OS X that can prevent losing all of your important files if hard drive failure occurs. Time Machine is a great program that runs on its own without you worrying about it. After initial setup, all you need to do is make sure the hard drive is connected or that your Time Capsule is running. Time Machine will keep hourly backups for the last day, daily backups for the past month, and weekly backups for everything older than a month. You can backup for years depending on how many files you keep.
What you need:
Your Mac
An external hard drive or a Time Capsule
If you don’t have an external hard drive, you can pick one up for $139.99 for a 1TB Seagate Backup Plus at your local CityMac.
Likewise, you can get a 2TB Time Capsule for $299.99 or a 3TB for $399.99
Time to set up
> 1 hour
Instead of the hard drive getting full like you would expect, Time Machine will automatically delete the oldest backup so you never have to worry about doing it yourself.
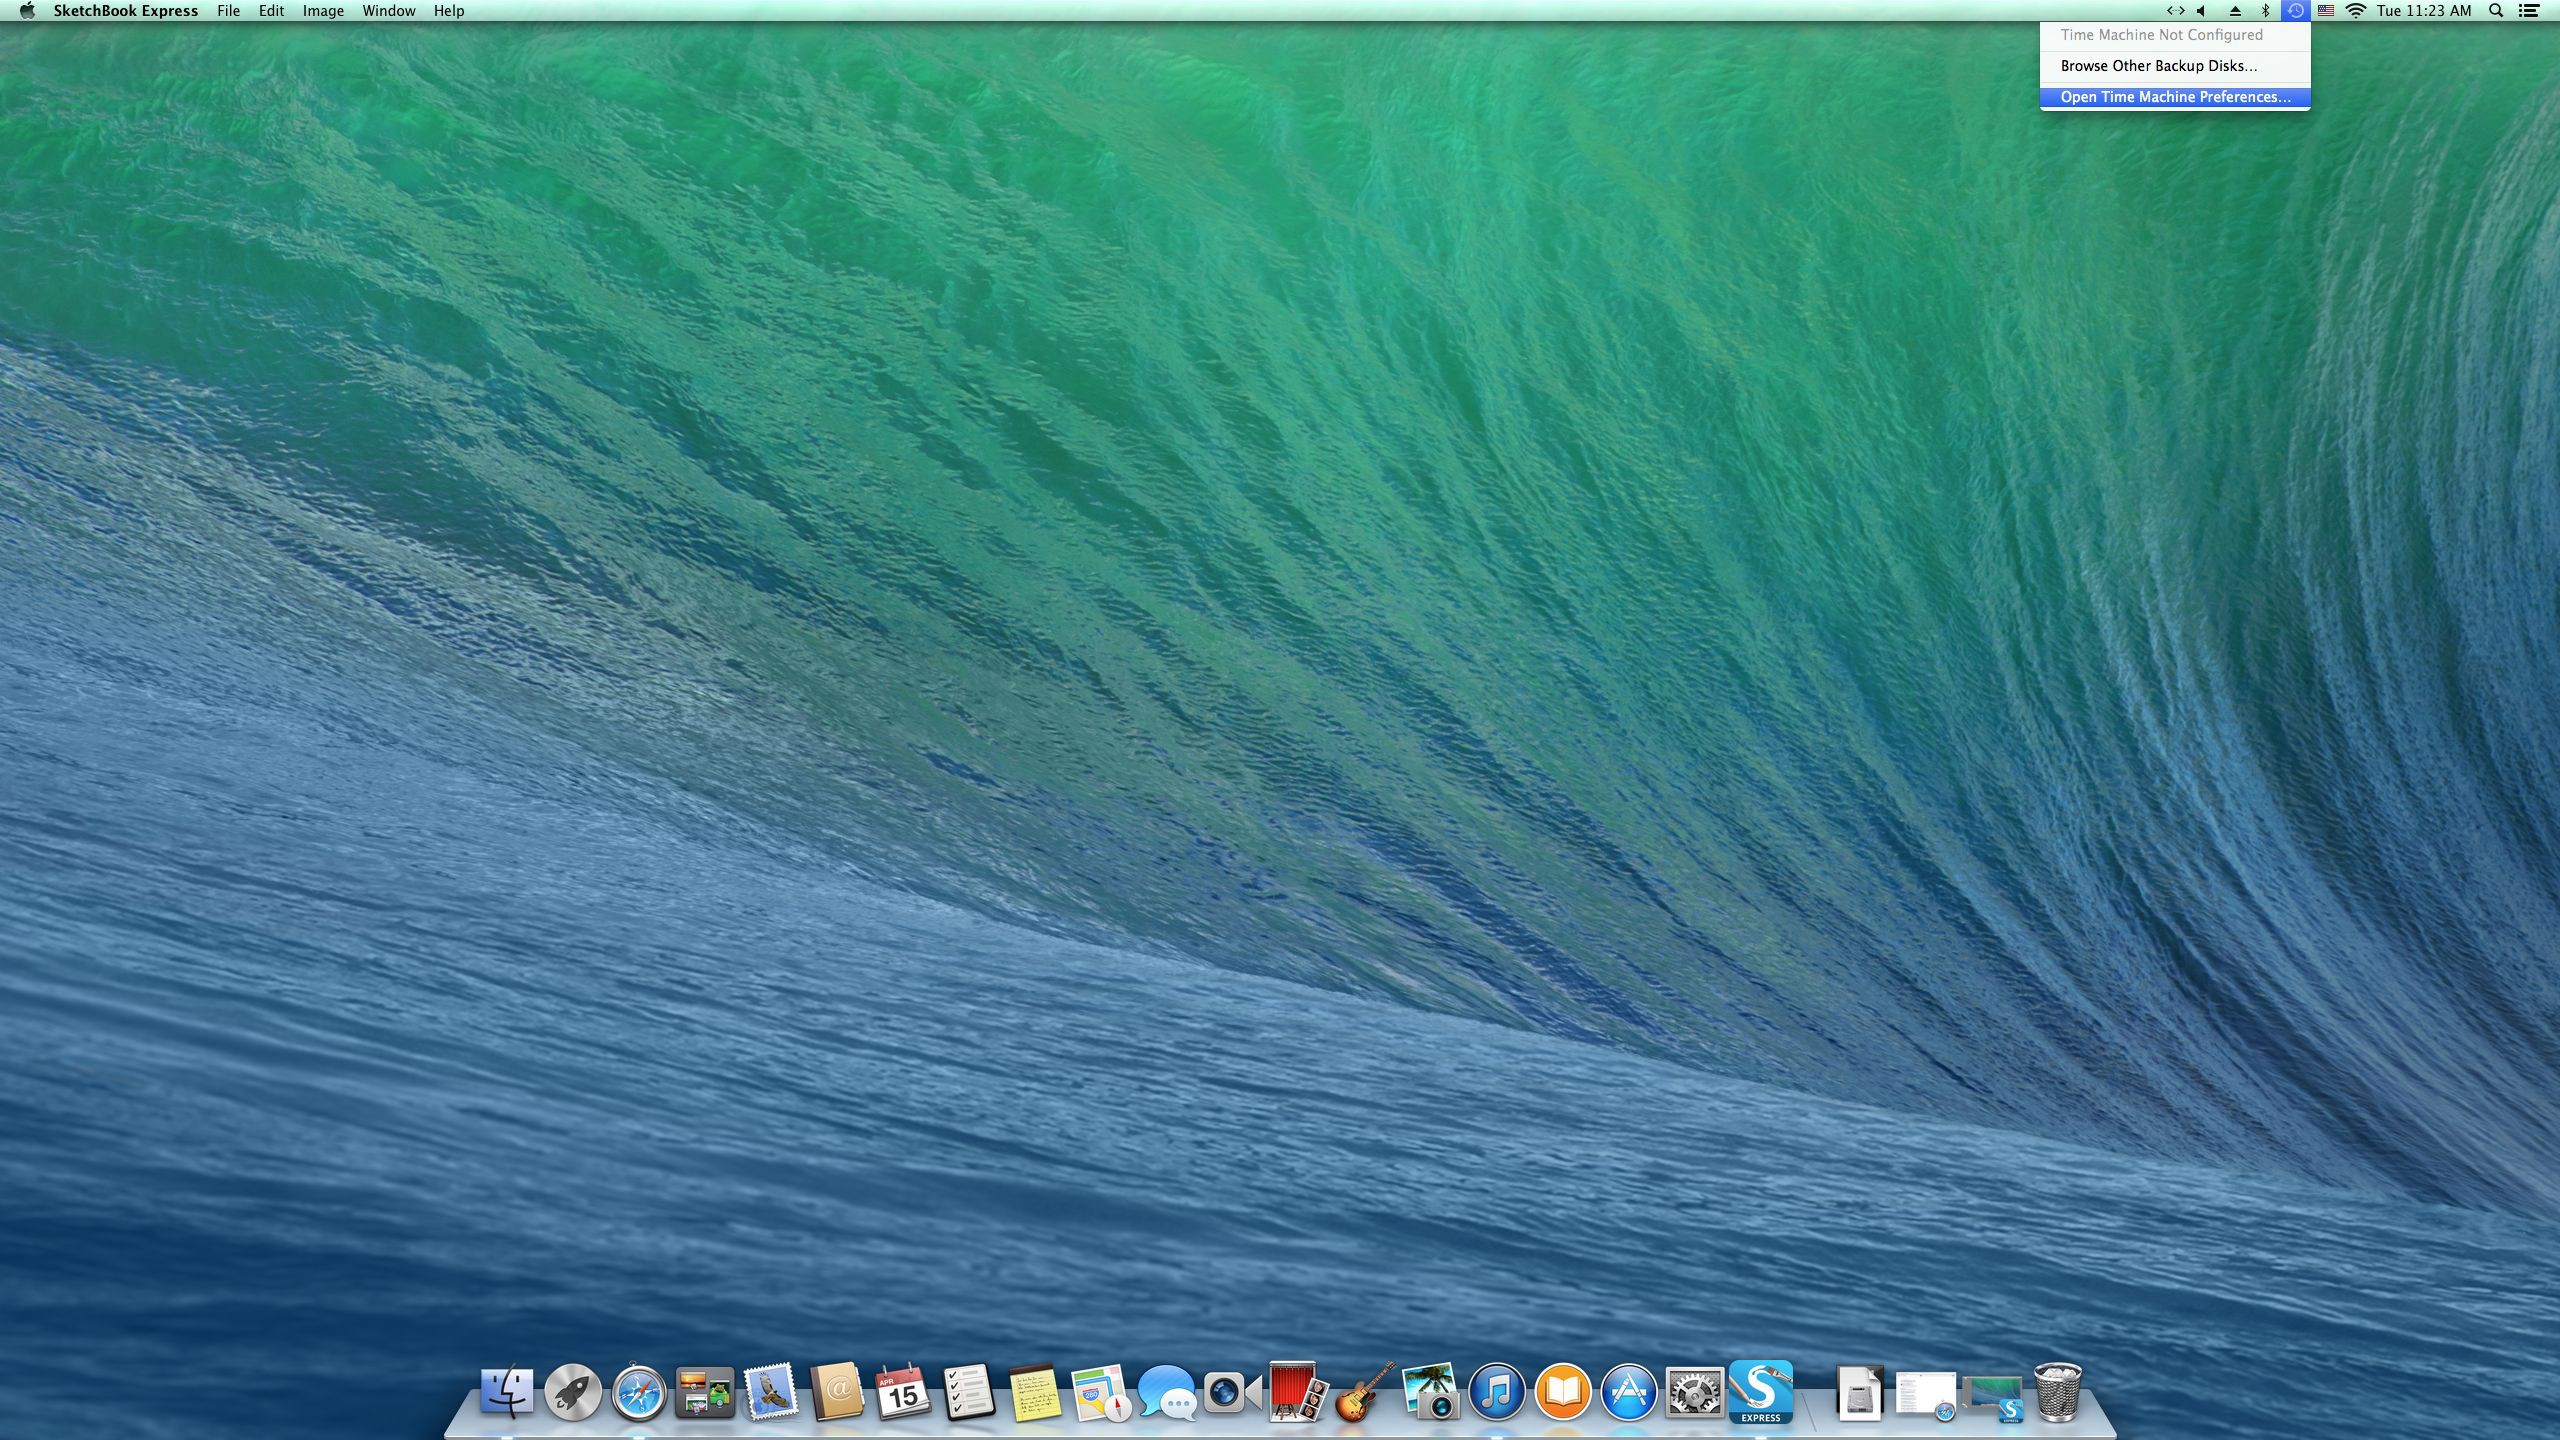
To get started, click the Time Machine icon in the top right corner of your Mac. Then click Open Time Machine Preferences.

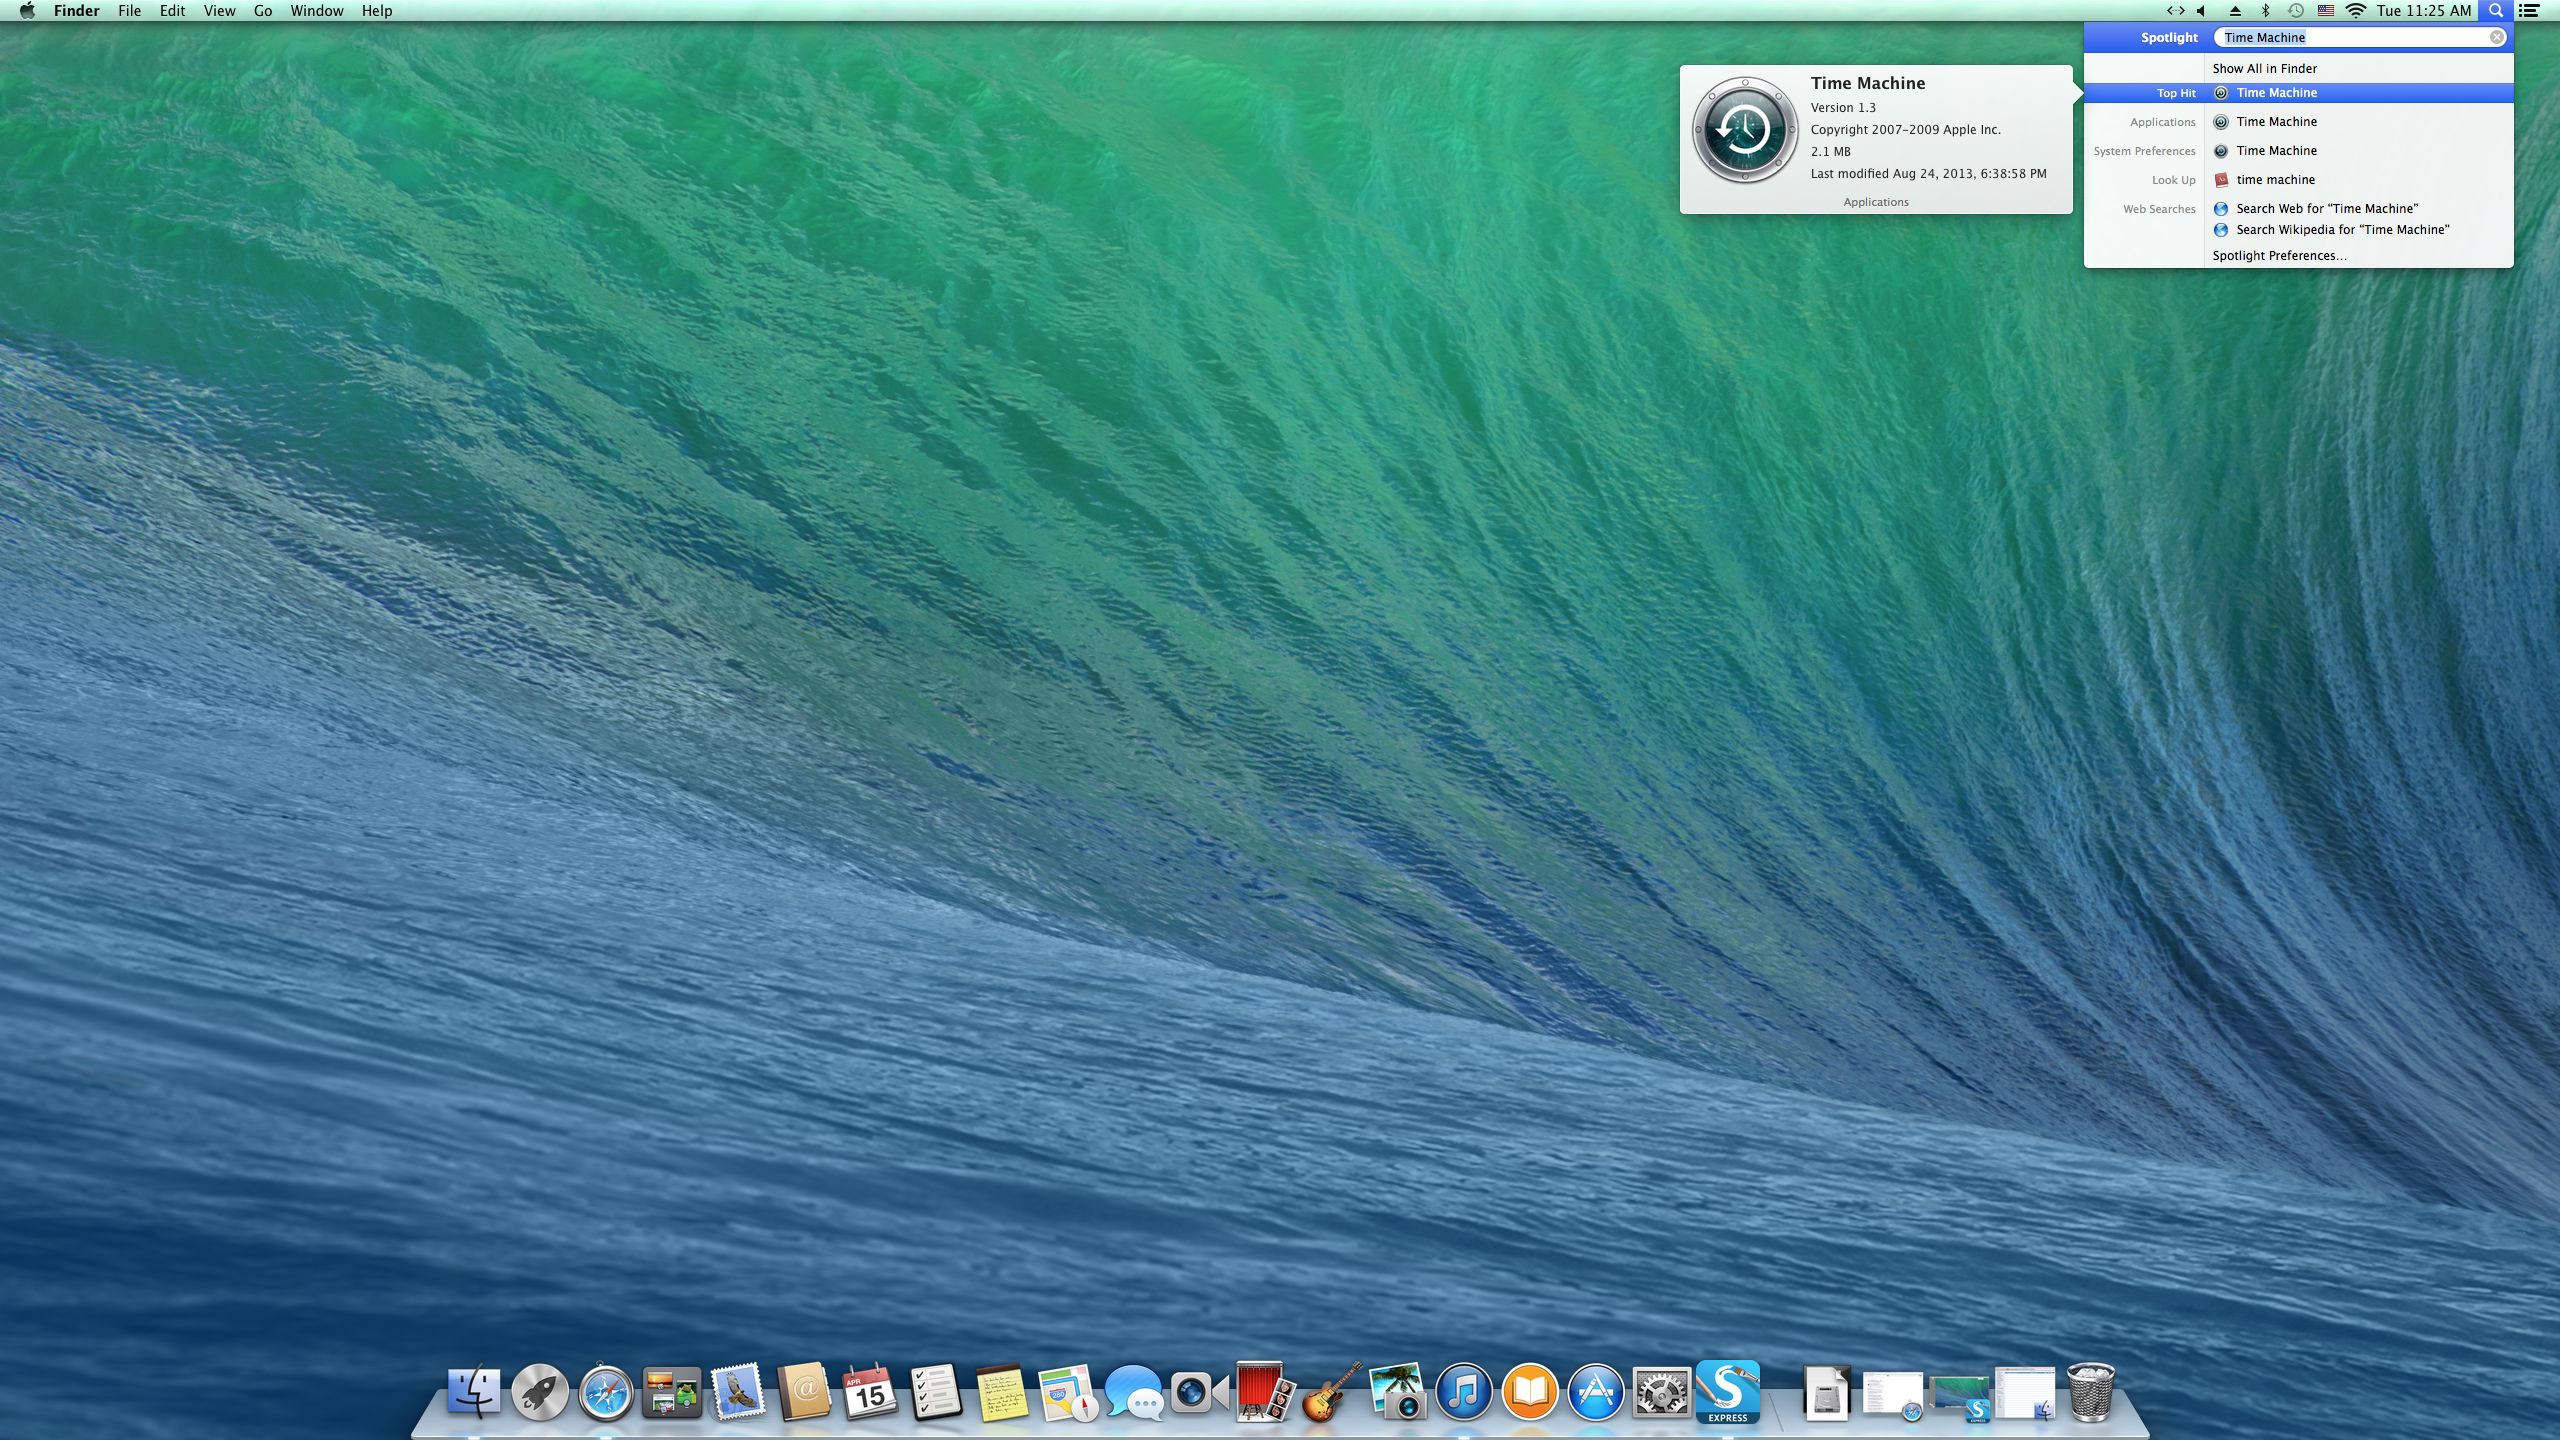
If there isn’t one there, use Spotlight to search for it like this. Just type Time Machine and it will be the first option.

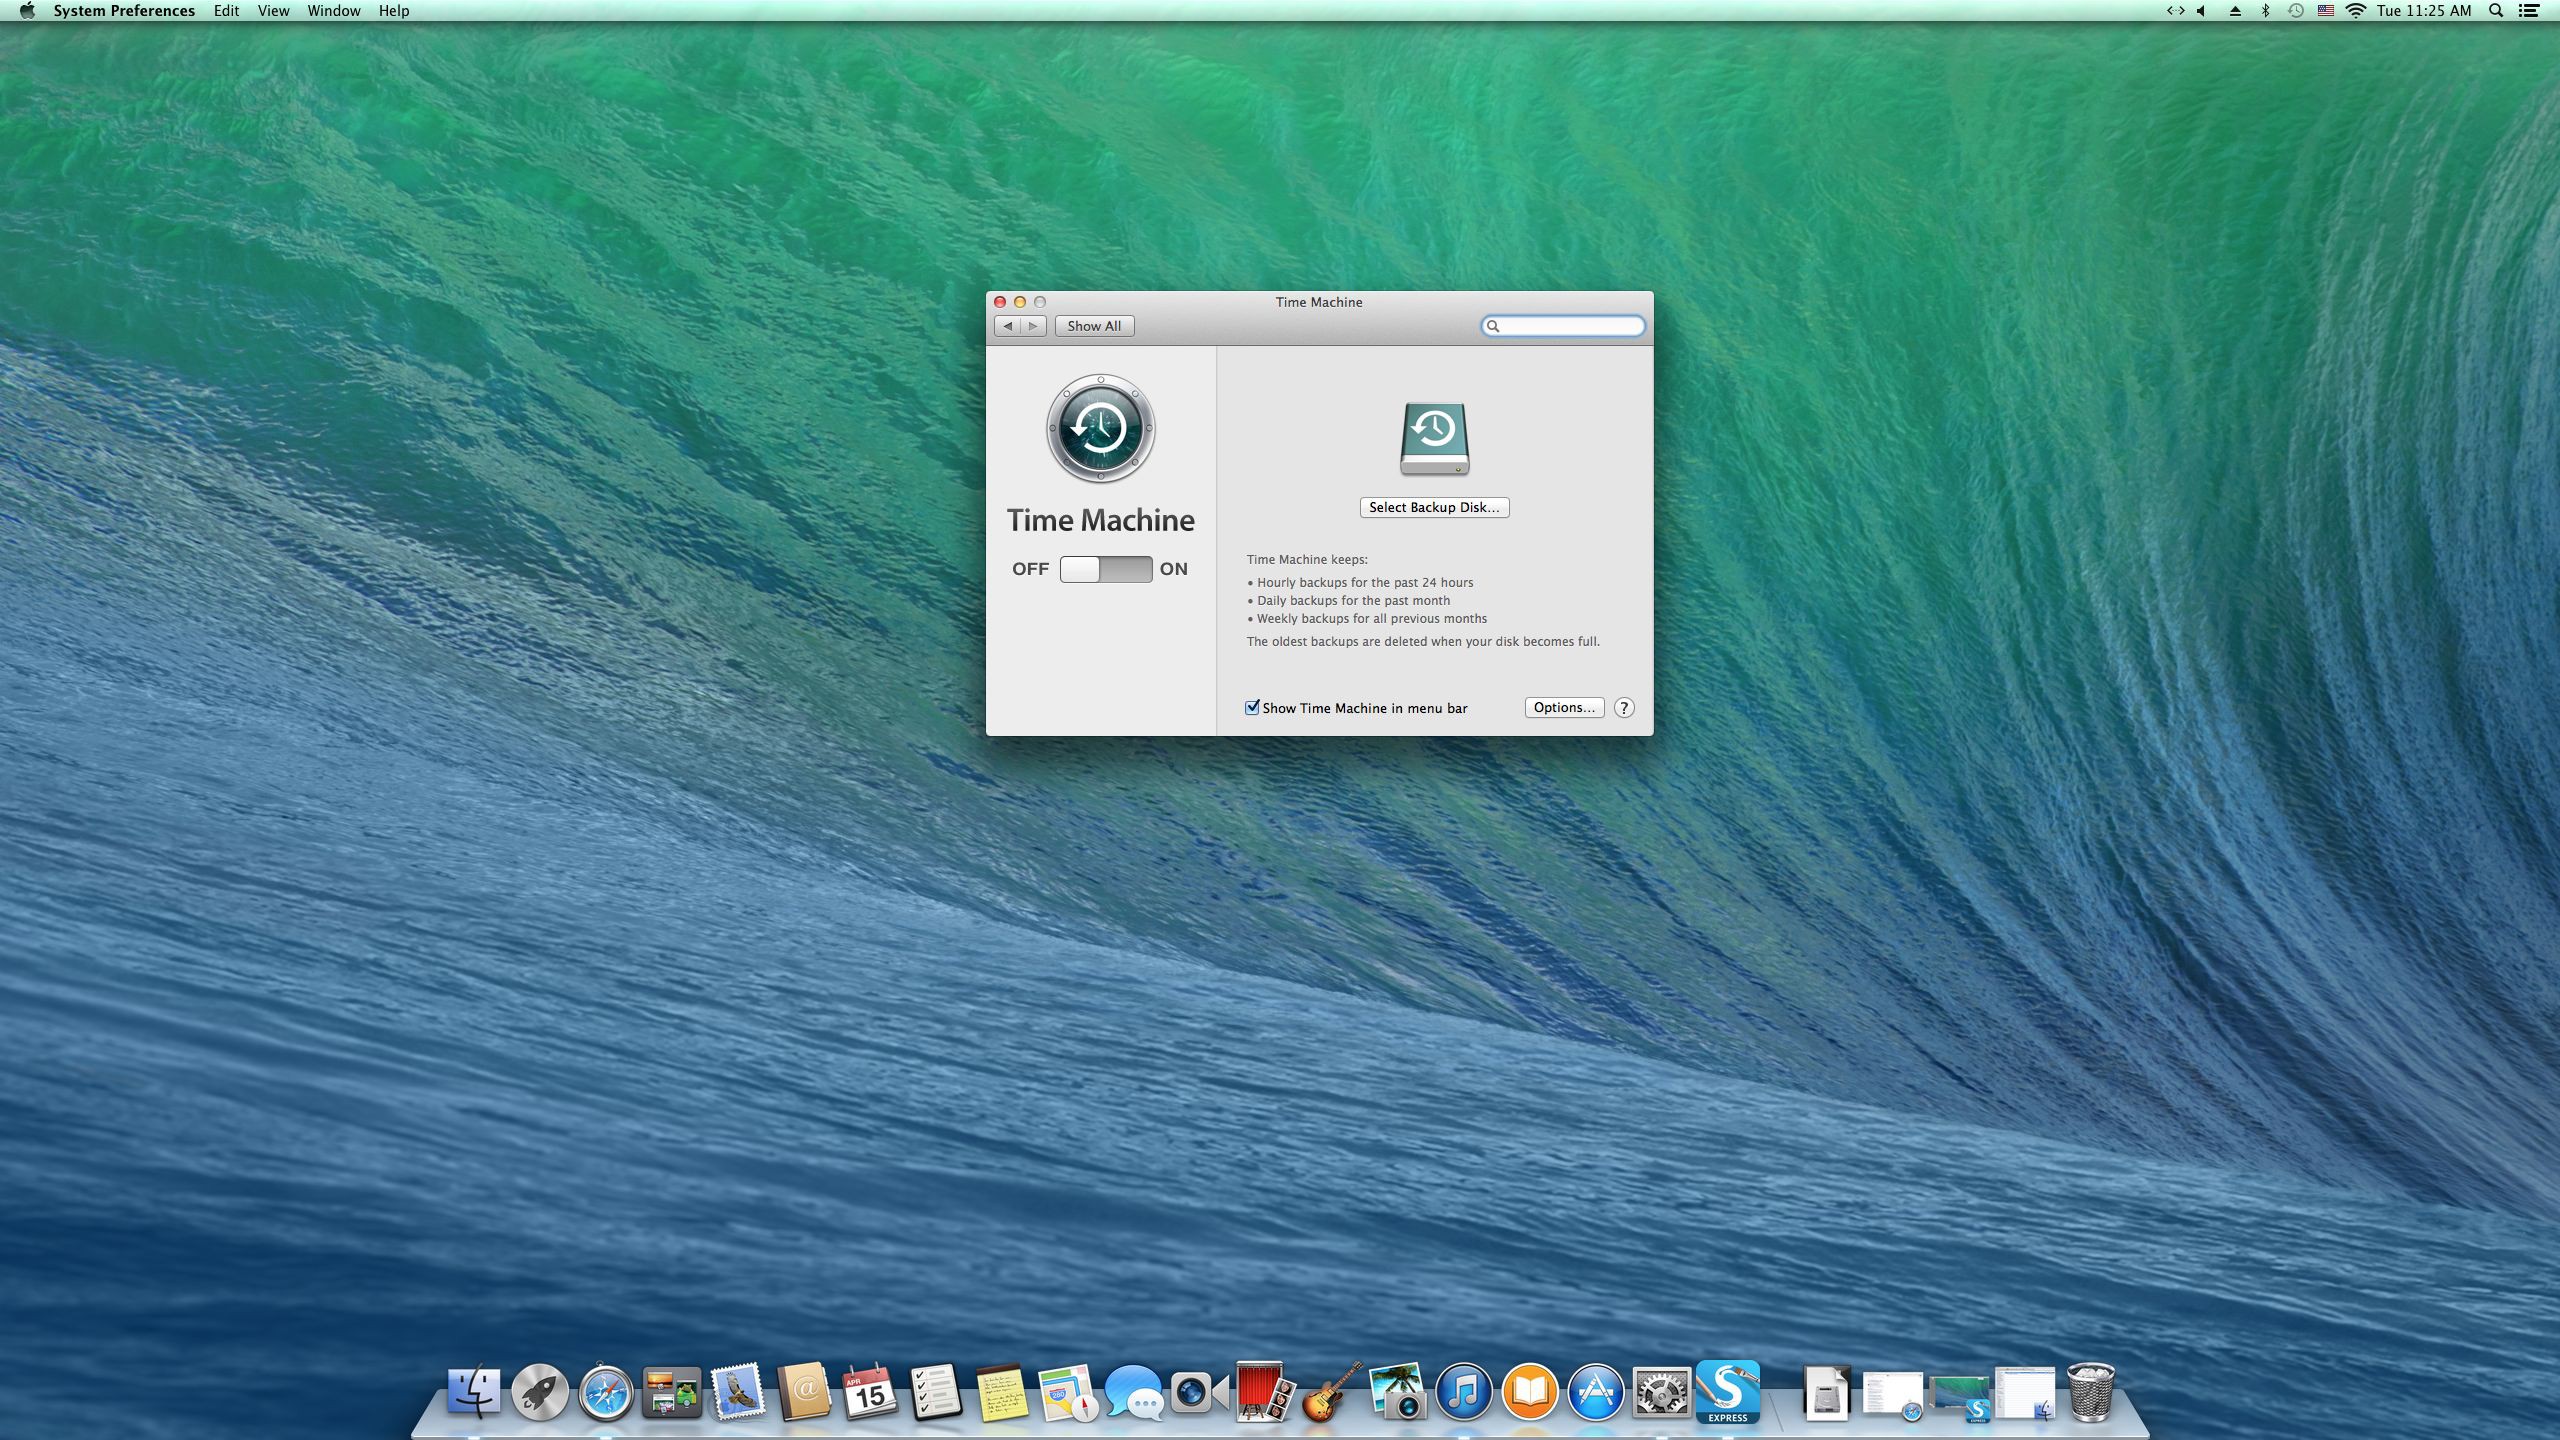
Once the Time Machine application is opened, the switch under the Icon on the left should be set to off. Click the switch to turn it on and it will bring up a menu to select the disk you onto which you want to backup. Choose either your Time Capsule or the hard drive you have plugged in, and it will start a count down for 2 minutes until it starts backing up.

Once you have completed the first backup (which will take upwards of an hour), your subsequent backups will be very quick.
Once you initialize Time Machine, you’ll never have to worry about losing your precious files. Here is a step-by-step summary.
1. Open Time Machine Preferences.
2. Turn on Backup.
3. Choose target disk for backing up.
4. Never worry again.
From George in Kirkland, have a great day!