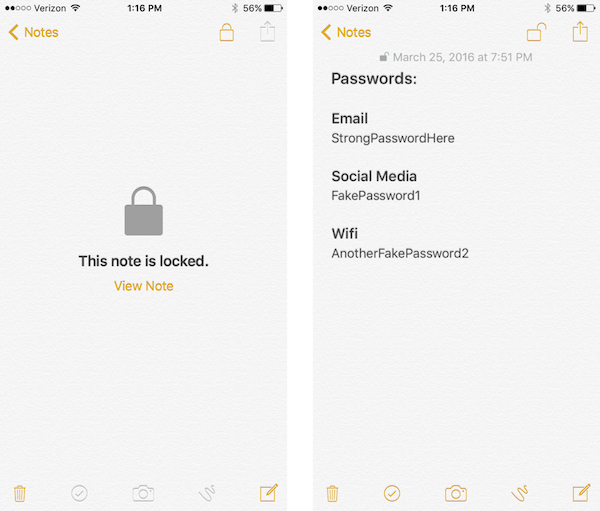
The ability to password protect notes in the Apple Notes app was added in iOS 9.3 and OS X 10.11.4. If you keep sensitive information such as passwords in your notes, you may be interested in knowing how to protect them from getting into the wrong hands by adding a password to the note. Follow along as we walk you through password protecting Notes in iOS and OS X.
Adding A Password to Notes on iOS
Step 1
Open Settings on your iOS device (iPhone, iPad, or iPod touch).
Step 2
Scroll down and select Notes.
Step 3
Choose Password. Here, you can add your password which will be used for notes. Touch ID is also supported.
Step 4
Once you have a password saved, open the Notes app.
Step 5
Find a note you would like to add a password to.
Step 6
With the note selected, press the Share button. It looks like a box with an arrow pointing out of the top.
Step 7
Press the Lock Note button to assign a password restriction to the selected note.

Once you have added the master password in Settings for Notes, it is simple to lock your individual notes on your device. You can then go to all the notes which have sensitive information and lock them. To lock the note after you are viewing it, simply press the button which looks like an open lock.
Adding A Password to Notes on OS X
To lock a note on OS X, the steps are similar to the iOS steps. Simply find a note you would like to password protect, and press the lock button. If you are using iCloud and have already set it up on iOS, you will be using the same password that you entered in the iOS Settings.
We hope that this blog has helped you if you were looking to add a password to your notes in the Apple Notes app. If you have any questions, please do not hesitate to leave a comment below. You can also connect with us on Twitter @CityMacTweets and on Facebook at facebook.com/WelcomeToCityMac.